Only VIP Escorts
Agency & Independent Escort Listings
How it works
To help with the process of registering and creating your profile we have provided screenshots below. Please click to view the step by step process for either creating an Agency profile or and Independent profile.
Please note you must add a link to OnlyVIPescorts.com. Failure to do this will result in your listing being rejected.
Agency Registration Guide
Registration Form
Fill in the registration form taking care to provide all *Required information

Click the button to complete your registration

Check your email inbox, and also the junk email folder just in case the confirmation email is mistaken for spam. Then click the link provided in the email

Clicking the link provided in the confirmation email will take you to the following screen. Click the “My Account” menu link on the right side to reveal the options available.
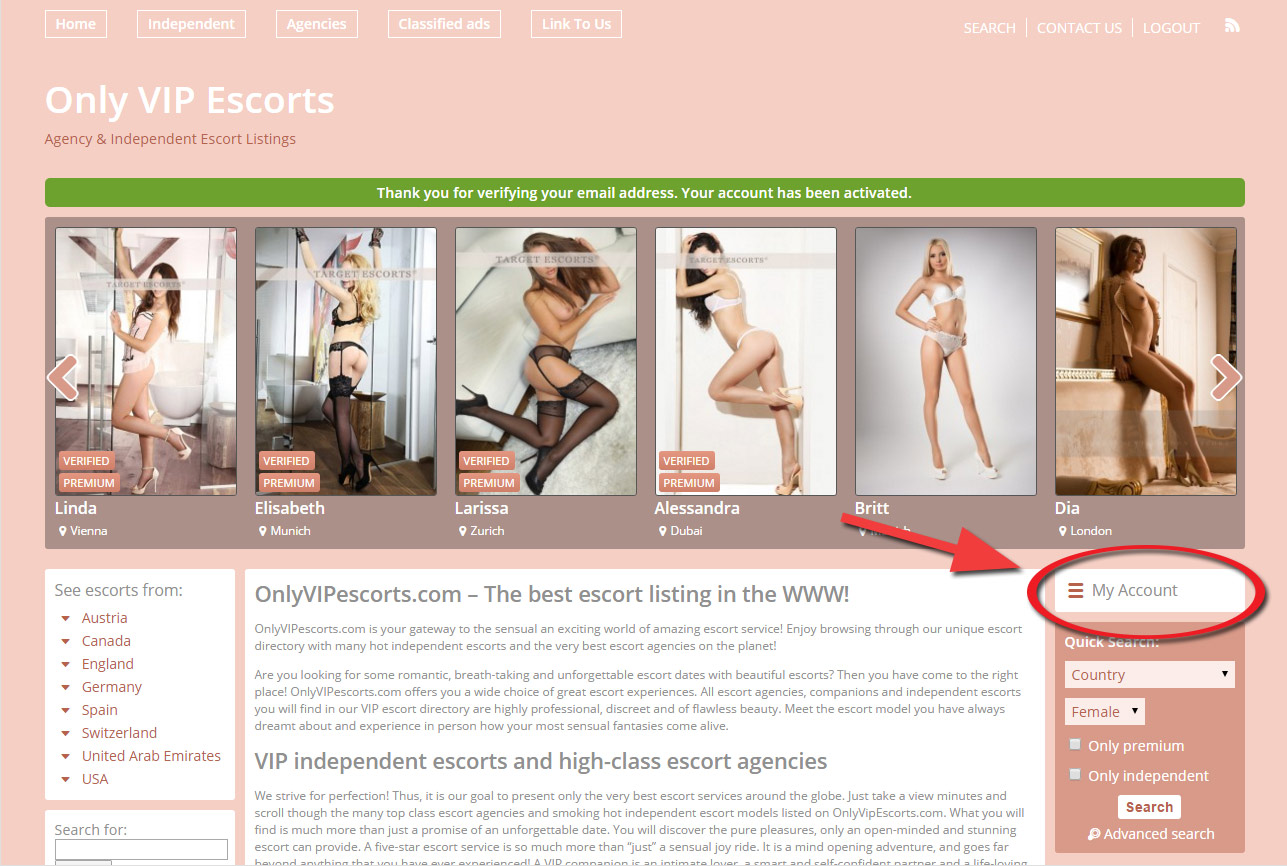
Click to either edit your profile (including adding a logo for your agency) or, to start adding escorts to you agency listing click the “Manage my escorts” link.

Add Escorts to your Agency Listing
Click the button shown to add a new escort.

Fill in the form provided making sure to include all *Required fields, and then click the button to submit and continue to the escort profile page.

Adding Photos
On this screen you will see an area where you can drag and drop images from a folder on your computer or you can click the link to browse your computer in the usual way.

Once each photo is uploaded you will see the option to either make the photo the main photo for your profile or delete the photo.

That’s it! Once you’ve setup your profile you can re-edit the content and add more escorts and photos any time.
Please note you must add a link to OnlyVIPescorts.com. Failure to do this will result in your listing being rejected.
Independent Registration Guide
Registration Form
Fill in the registration form taking care to provide all *Required information

Click the button to complete your registration

Check your email inbox, and also the junk email folder just in case the confirmation email is mistaken for spam. Then click the link provided in the email

Adding Photos
Clicking the link provided in the confirmation email will take you to the following screen. Click the “My Account” menu link on the right side to reveal the options available and then select “View my profile” to start adding photos.

On this screen you will see an area where you can drag and drop images from a folder on your computer or you can click the link to browse your computer in the usual way.

Once each photo is uploaded you will see the option to either make the photo the main photo for your profile or delete the photo.

That’s it! Once you’ve setup your profile you can re-edit the content and photos any time.
Please note you must add a link to OnlyVIPescorts.com. Failure to do this will result in your listing being rejected.
Quick Search: